Cross-chain swaps
The Cross-chain swaps feature on swap.cow.fi lets you swap a token on one network and receive a different token on another network — all in one seamless transaction.
This guide will walk you through the process step-by-step, from setting up your trade to tracking it in the explorer.
Currently, the Cross-chain swaps functionality is limited to swap orders and is not available for smart contract wallets. These features will be available in the future.
1. Setting up a Swap with Different Network Assets
When using Cross-chain swaps, you’ll start by selecting the tokens you want to trade — just like a regular swap — but with the option to choose a different destination chain.
Source Token Selector
Open a source token selector:
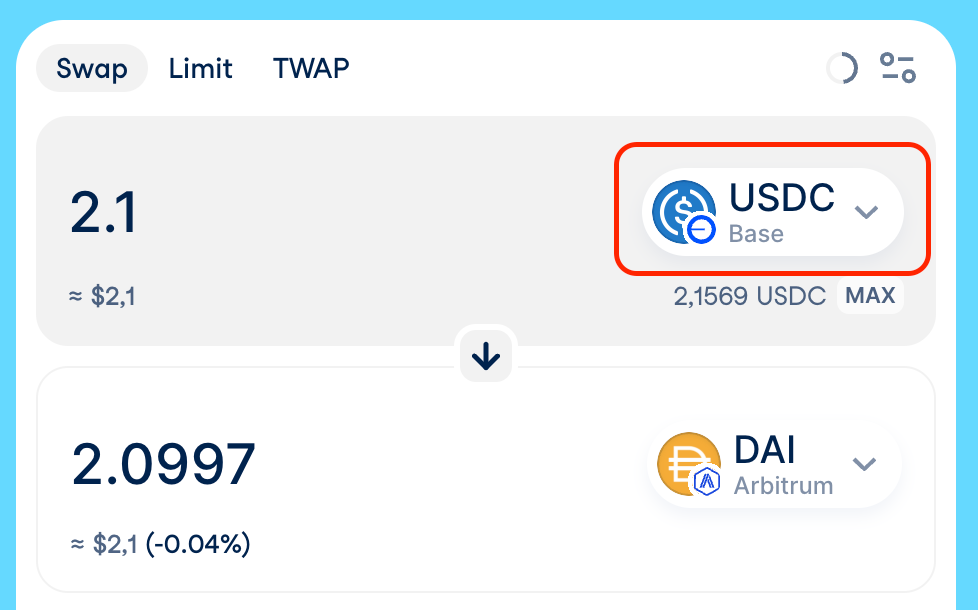
Select the network and token you want to sell:
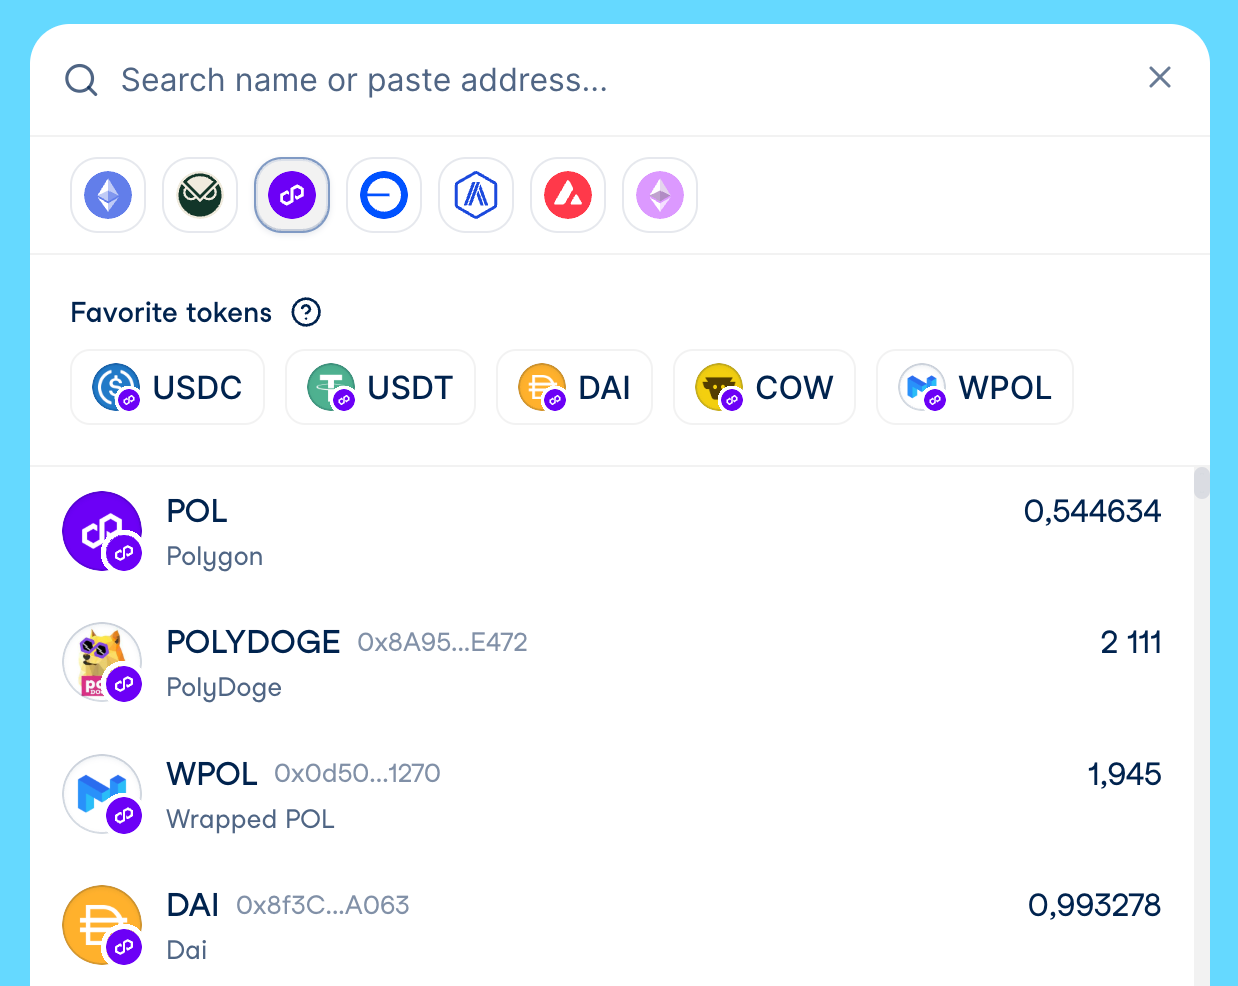
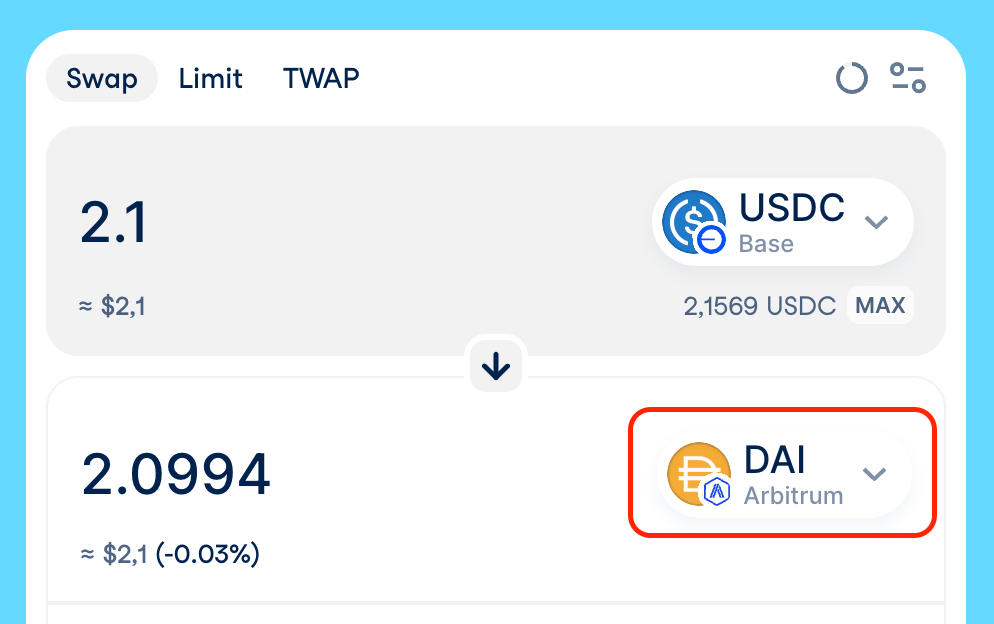
Destination Token Selector
Similarly to Source Token Selector, open the selector, choose a network and token you would like to buy
The list of available destination networks depends on the source token you’ve selected.
If you choose a destination network different from the source token’s network:
- You will only see tokens supported by the bridge provider for that chain.
If the destination network is the same as the source network:
- You’ll see the regular list of tokens from the token lists.
Tokens must be different. Bridging the same token between two networks is not yet supported. This feature will be available in the future.
2. Creating a Cross-chain swap
Once your tokens and networks are set, you can proceed to create the order.
Token Approval
If it’s your first time selling this token through CoW Swap, you’ll need to approve it. This is the standard ERC-20 approval process that allows CoW Protocol to use your tokens for the trade.
Approvals can happen through:
- Regular ERC-20 allowance transactions
- EIP-2612 signature (when supported by the token)
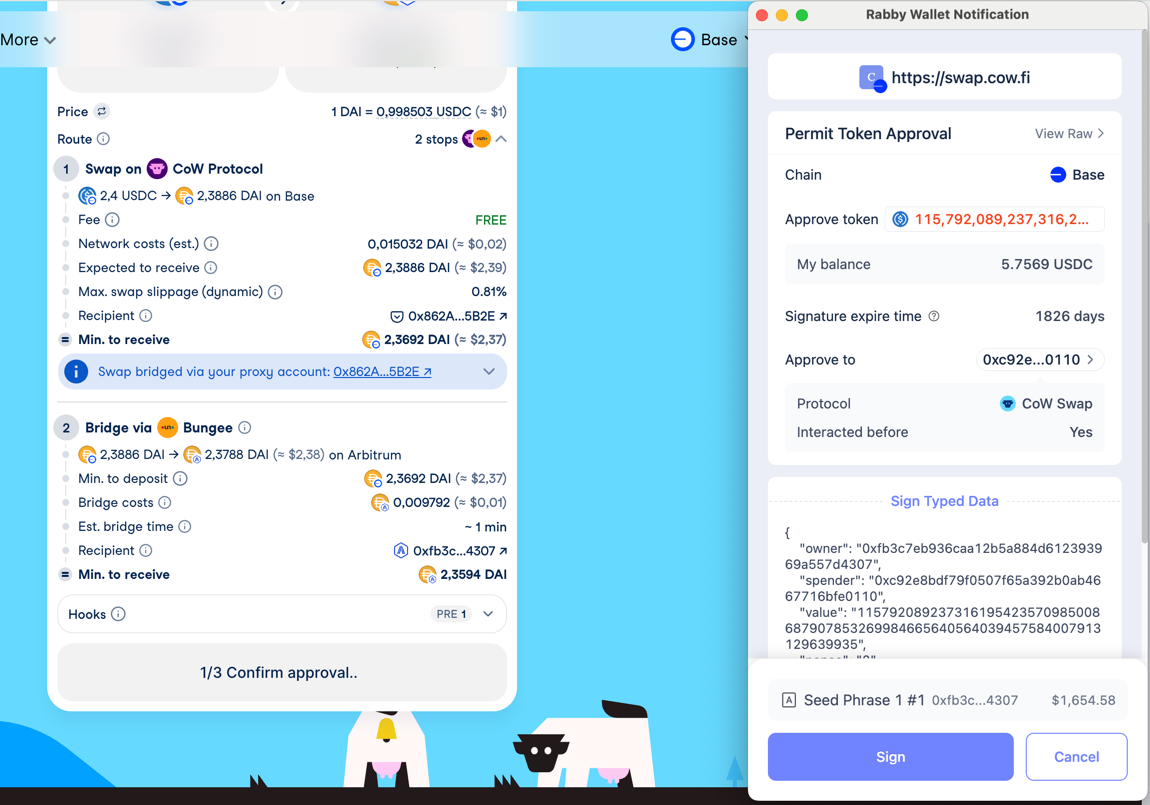
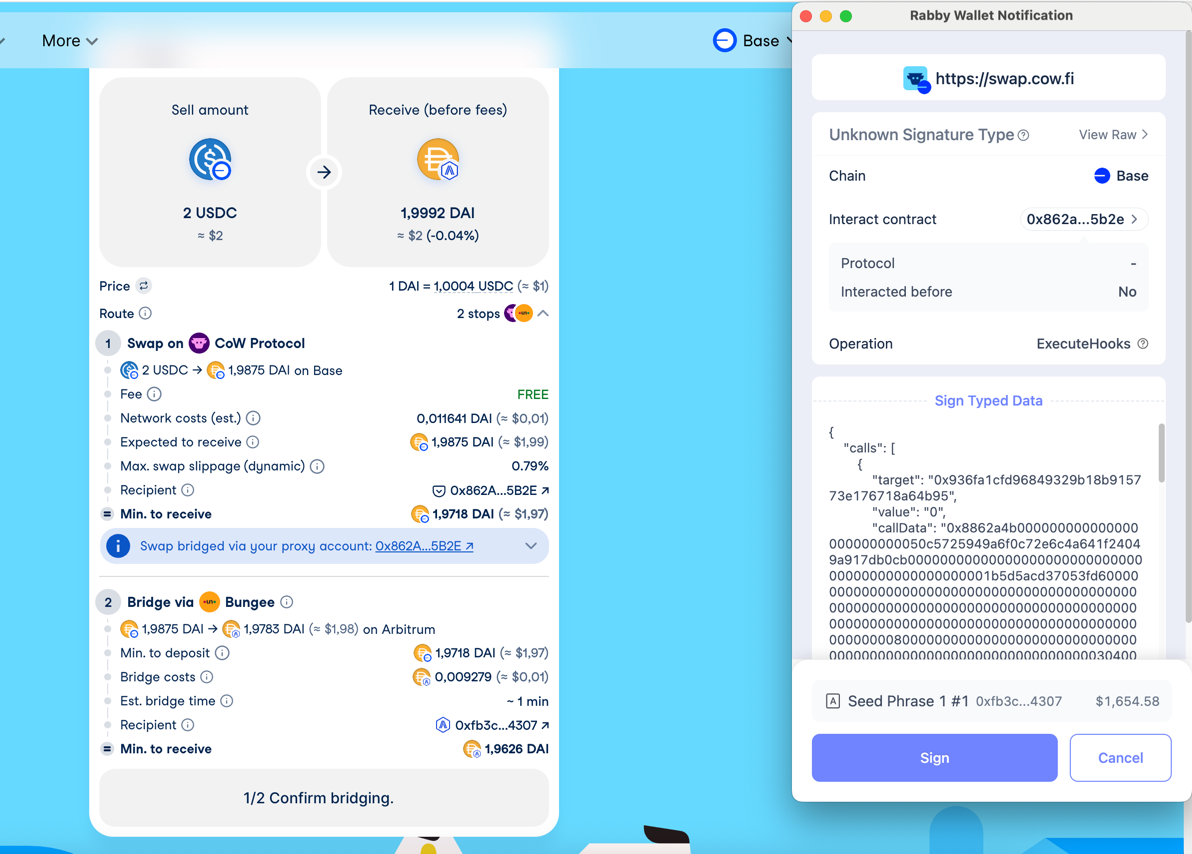
Signing Steps
- Sign the post-hook call for the bridge provider.
- The post-hook might include a call to approve an
intermediate tokenin the Account Proxy, allowing it to be transferred to the deposit smart contract. - The post-hook always includes a call to the bridge provider’s smart contract, which transfers the swapped amount to the deposit smart contract.
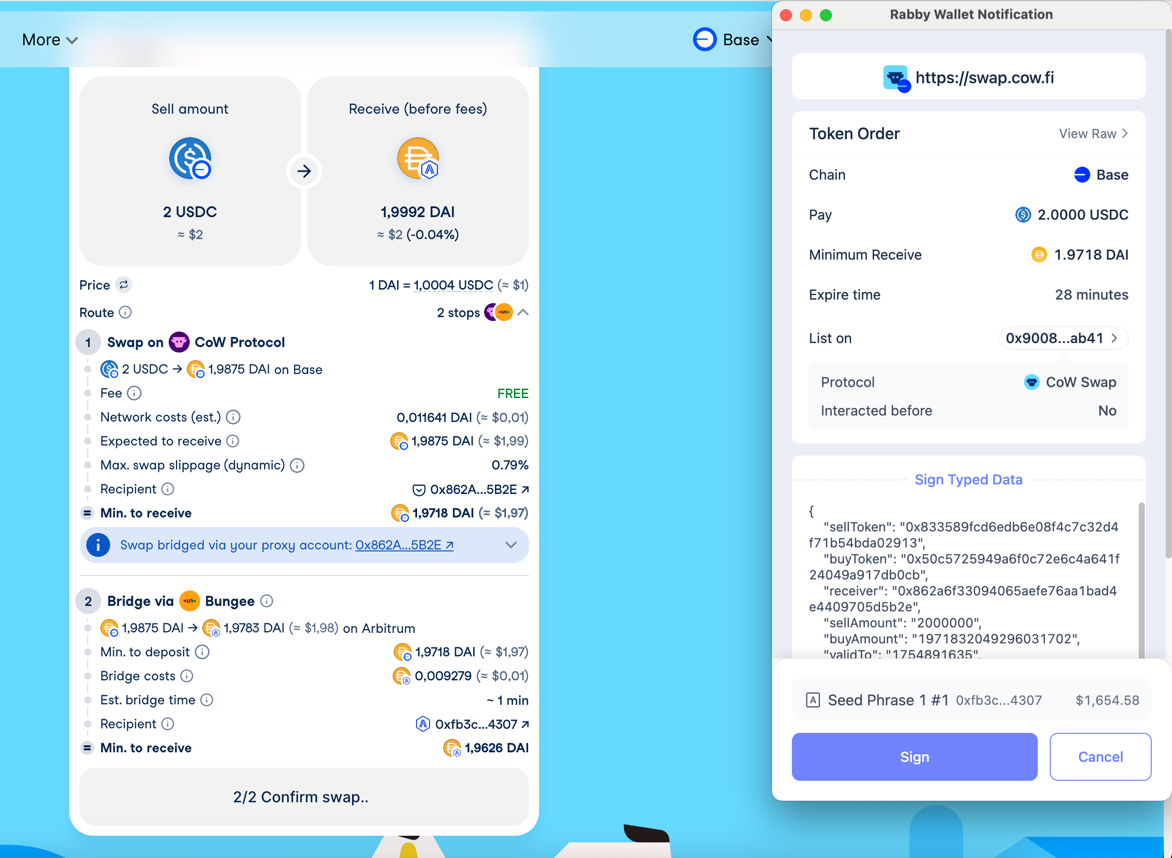
- Sign the order:
- Sign an off-chain order (ERC-20 token selling).
- Sign a transaction (Native tokens (e.g., ETH) selling).
Intermediate token — the currency received on the source chain as the result of a swap, which is then deposited to the bridge provider. It is usually the same currency as on the destination chain, but issued on the source blockchain.
If a token to sell does not have an approved permit, the process will involve three signing steps, beginning with the permit signature.
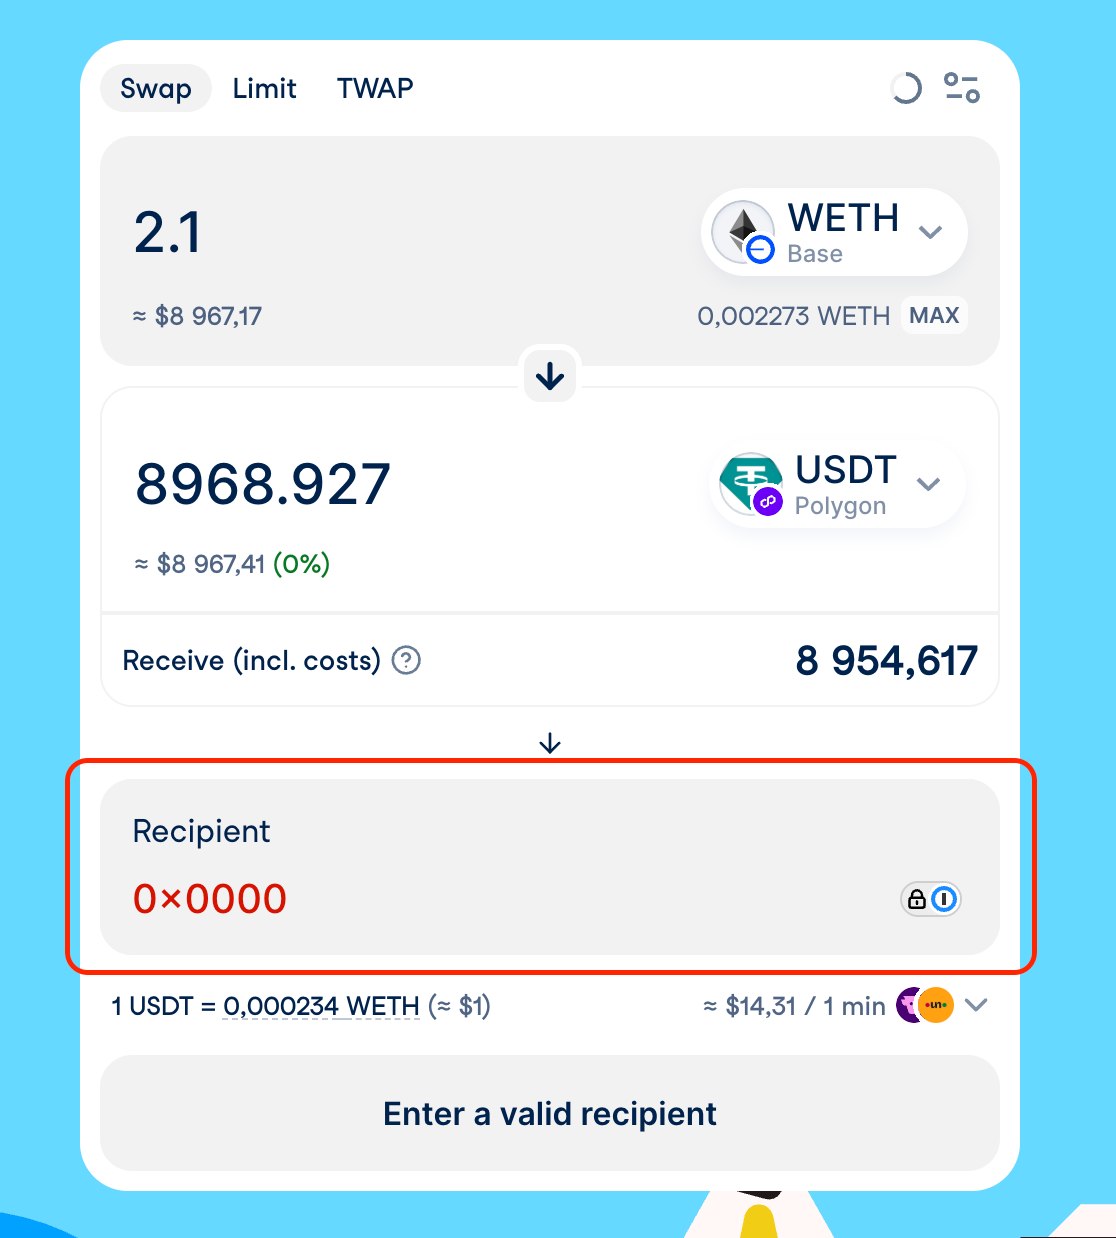
3. Using a Custom Recipient
By default, your connected wallet address will be set as the recipient on the destination chain. If you want to send funds to another address:
- Enable Custom recipient in the settings (same place as in the regular Swap).
- Enter a recipient address.
- Note: ENS names are not supported here — you must use a full wallet address.
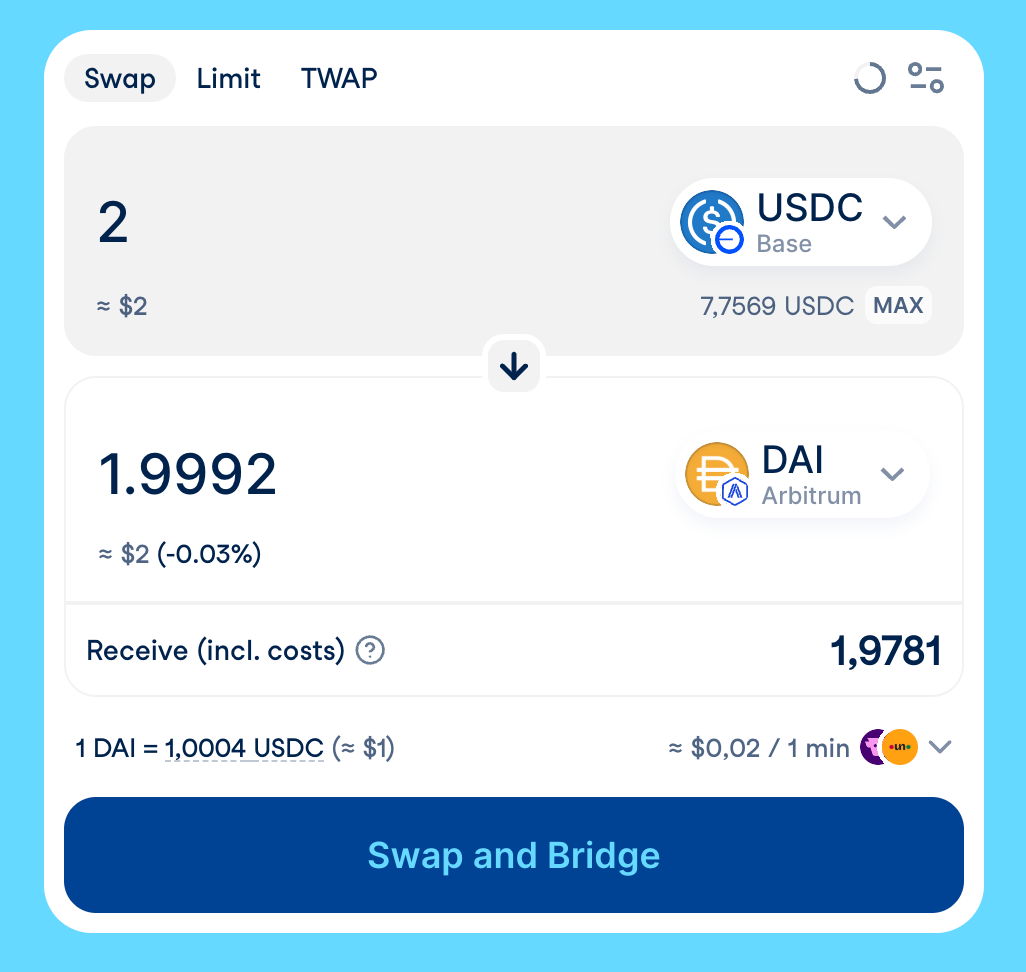
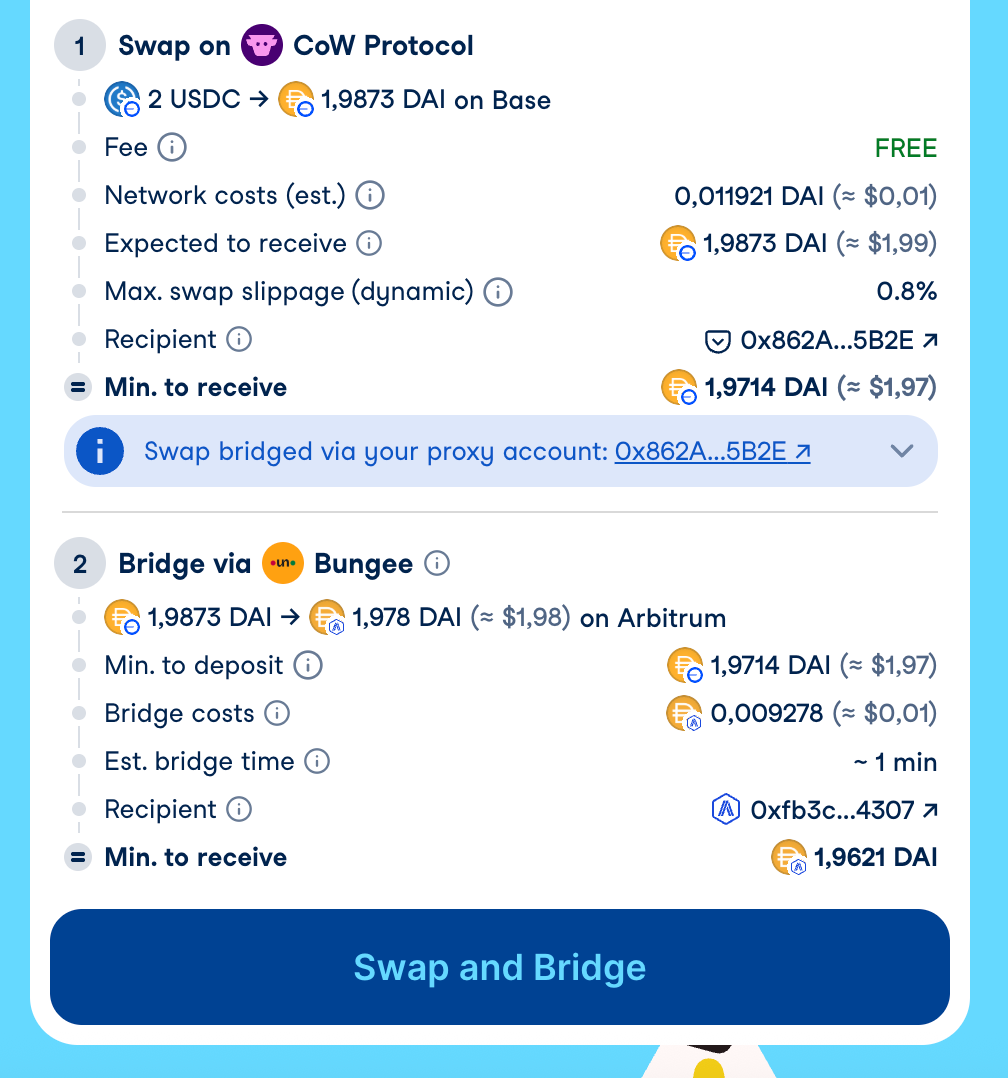
4. Previewing Your Quote
In the Swap form you can see a detailed breakdown of the expected swap and bridge:
- Swap Min. to receive → Final amount after all swap costs and a slippage tolerance.
- Expected deposit amount → This is equal to the “Expected to receive” amount from the swap step.
- Bridge cost → A fee charged by a bridge provider for processing your transfer.
- Estimated bridging time → Pulled directly from a bridge provider (varies by a network and a provider).
- Bridge Min. to receive → Calculated as:
(Swap min. to receive)-(Bridge provider cost)
5. Understanding the Account Proxy
The Account Proxy (also known as CoW Shed) is a helper contract that powers advanced features like CoW Hooks.
- CoW Hooks allow solvers to execute additional Ethereum calls before or after your order is settled.
- Your funds are safe: If anything goes wrong during execution, your assets will be sent to your personal proxy account. You can withdraw them to your wallet at any time.
More detailed information can be found in Account Proxy page.
6. How Bridging Execution Works
- The bridge step will only start after a successful swap.
If your order expires, is canceled, or fails, bridging will not start — your funds will remain in your wallet.
You can only soft‑cancel your order during the swap phase. Once the swap has executed and the bridge deposit has been submitted by your Account Proxy, the bridge transfer cannot be canceled. It will complete on the destination chain or be refunded per the provider’s policy.
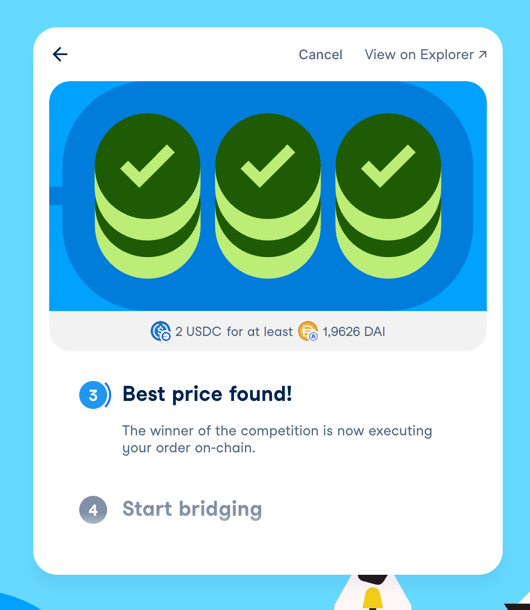
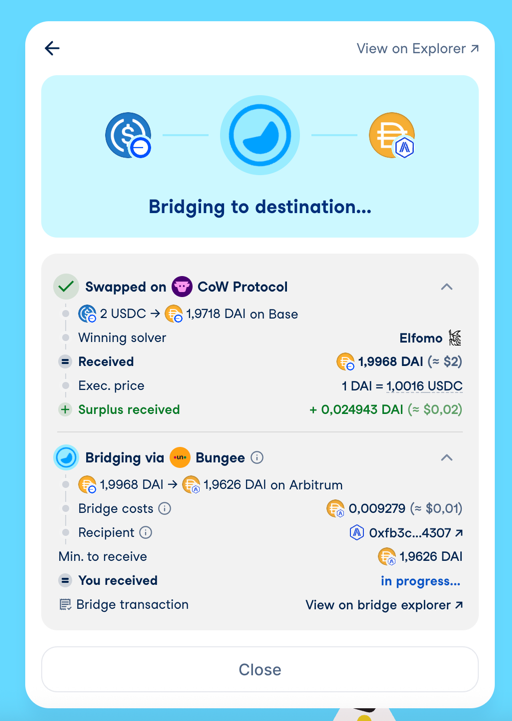
- Once the swap completes:
- The order goes into 'Bridging in progress' status.
- The received amount is sent to your Account Proxy.
- From there, it’s deposited into the bridge provider’s smart contract.
- These steps happen within one transaction.
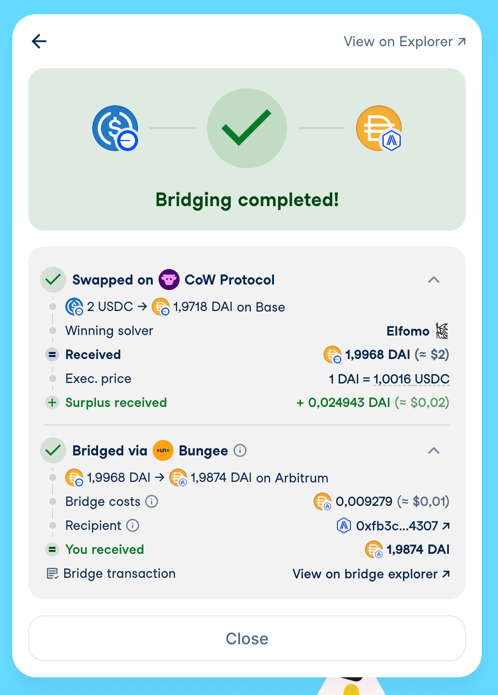
- When the bridging completes, you’ll see a “Bridging completed!” status along with the final amount received on the destination chain.
- You’ll always get a link to the bridge provider’s explorer to track your order progress.
- Your Cross-chain swaps history is available in the Account modal on CoW Swap. .
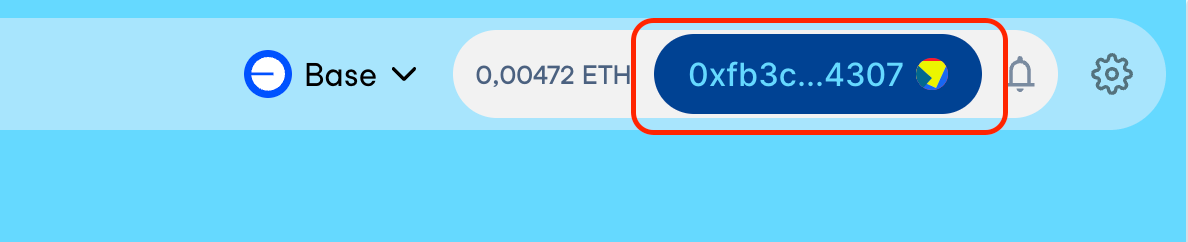
Account modal displays only last 10 orders. For your full order history, visit CoW Explorer
7. If Bridging Fails — Getting a Refund
In rare cases, the bridging step may fail. Don’t worry — your funds are safe.
Most bridge providers will automatically send your funds back to your Account Proxy once the deposit expires.
Expiration time varies by provider. For example, Across provider usually refunds after ~3 hours if the deposit hasn’t been completed.
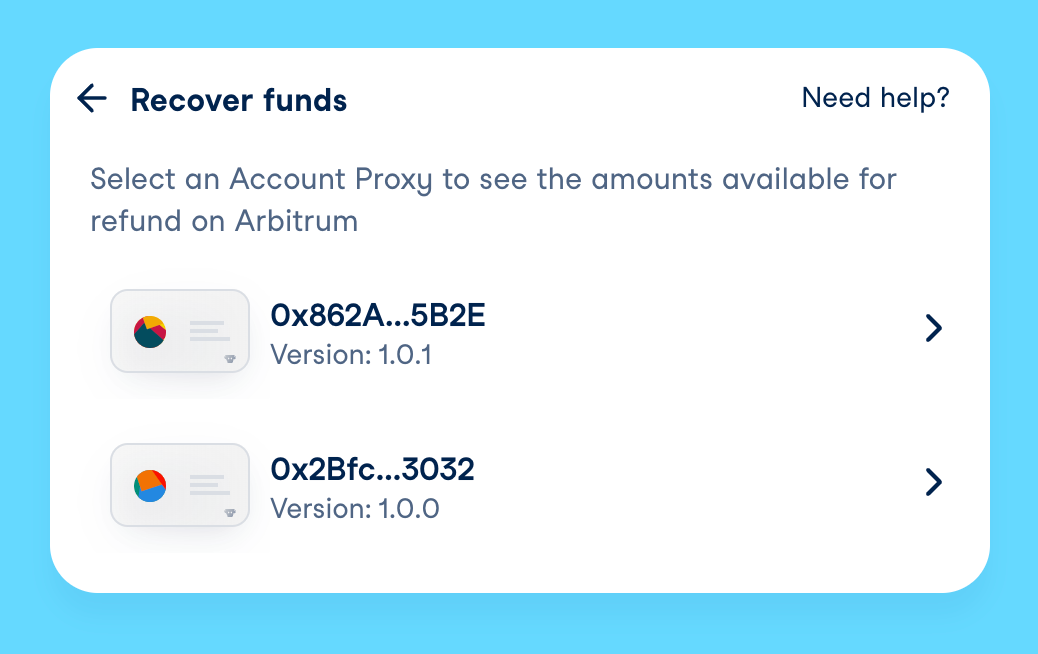
Once the refund arrives in your Account Proxy:
- Open the CoW Swap Account Proxy page.
- In the list of Account Proxy versions, select the latest Account Proxy version (unless you’ve been told to use a different one).
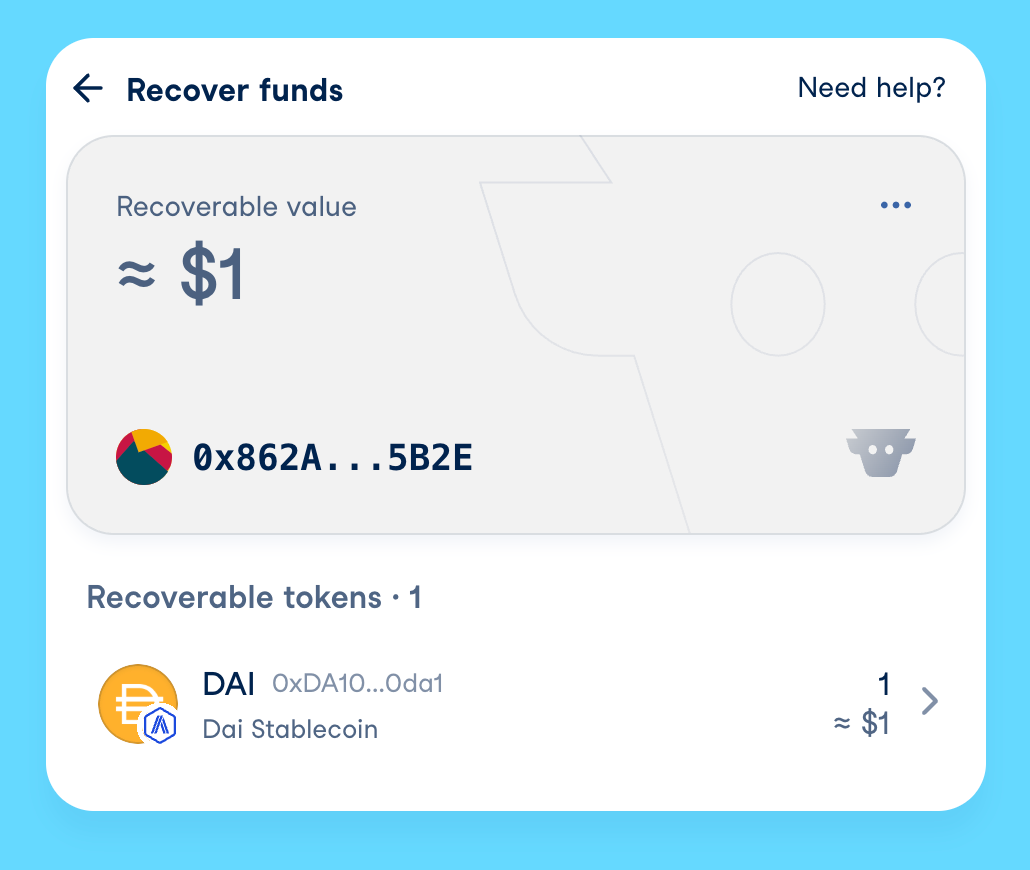
- Open details of the required Account Proxy version.
- Choose a token and recover the funds to your wallet.
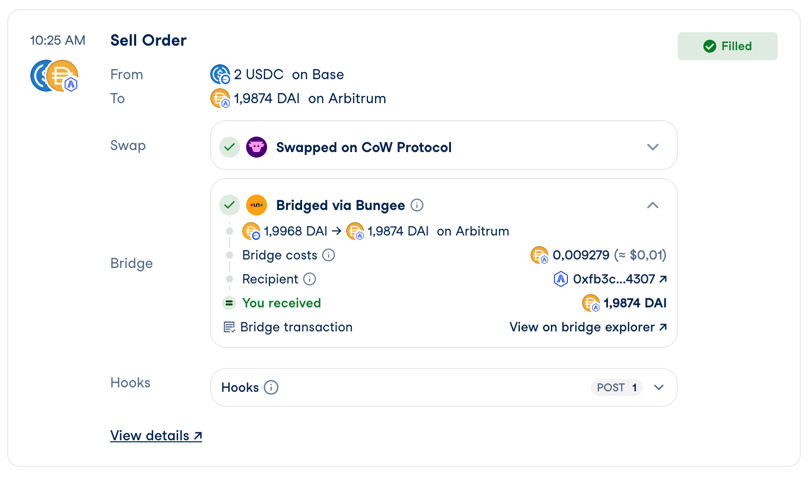
8. Tracking Your Orders in the Explorer
You can view all your Cross-chain swaps on explorer.cow.fi.
- See orders in any state — In Progress, Completed, Cancelled, and more.
- Filter results and view full details for each trade.
- Each Cross-chain swap has two tabs — Swap and Bridge — so you can easily explore both parts of the transaction.
