CoW Swap Widget
Integrate the power of CoW Swap into your product!
With the widget, you can create an incredible trading interface. Specify the required pair of currencies, customize the
look and much more!
Create your own widget using the configurator https://widget.cow.fi.
Install
yarn add @cowprotocol/widget-lib
npm install @cowprotocol/widget-lib
Quick start
import { createCowSwapWidget, CowSwapWidgetParams } from '@cowprotocol/widget-lib'

// HTML element where the widget will be rendered
const widgetContainer = document.getElementById('cowswap-widget')

const params: CowSwapWidgetParams = {
  appCode: 'NAME-OF-YOU-APP', // Add here the name of your app. e.g. "Pig Swap"
  width: 600,
  height: 640,
  sell: { asset: 'DAI' },
  buy: { asset: 'USDC', amount: '0.1' },
}

createCowSwapWidget(widgetContainer, { params })
App key
You must specify the appCode parameter when initializing the widget. This parameter is used to identify the source of
orders.
The key must be a UTF8 string of up to 50 chars.
It will be a part of orders meta-data, see more in
the CoW Protocol Docs.
Partner fee
You may participate in the Partner Fee program to collect fee on Market order trades executed by your users through the Widget by adding the following parameter to your Widget:
import { createCowSwapWidget, CowSwapWidgetParams } from '@cowprotocol/widget-lib'

const widgetContainer = document.getElementById('cowswap-widget')

const params: CowSwapWidgetParams = {
  partnerFee: {
    bps: 50, // 0.5%
    recipient: '0x0000000000000000000000000000000000000000', // Fee destination address
  },
}

createCowSwapWidget(widgetContainer, { params })
This configuration will apply a partner fee for all networks and trade types (swaps, limit orders, TWAPs, etc.). You can use Flexible config for having more flexibility, or Advanced configuration to have even more control over the partner fee configuration parameters.
Flexible config
Both bps and recipient can be set for different chains and different trade types (swap/limit/advanced).
Bellow you can see the partnerFee configuration variations:
import { PartnerFee, SupportedChainId, TradeType } from '@cowprotocol/widget-lib'

// The fee is 1% for all trades on all chains
const a: PartnerFee = { bps: 100, recipient: '0x0000000000000000000000000000000000000000' }

// Different fee per network and per trade type, same recipient for all
const b: PartnerFee = {
  bps: {
    [SupportedChainId.MAINNET]: { [TradeType.SWAP]: 100, [TradeType.LIMIT]: 50, [TradeType.ADVANCED]: 30 },
    [SupportedChainId.ARBITRUM_ONE]: { [TradeType.SWAP]: 100, [TradeType.LIMIT]: 50, [TradeType.ADVANCED]: 30 },
    [SupportedChainId.BASE]: { [TradeType.SWAP]: 100, [TradeType.LIMIT]: 50, [TradeType.ADVANCED]: 30 },
    [SupportedChainId.GNOSIS_CHAIN]: { [TradeType.SWAP]: 100, [TradeType.LIMIT]: 50, [TradeType.ADVANCED]: 30 },
    [SupportedChainId.AVALANCHE]: { [TradeType.SWAP]: 100, [TradeType.LIMIT]: 50, [TradeType.ADVANCED]: 30 },
    [SupportedChainId.POLYGON]: { [TradeType.SWAP]: 100, [TradeType.LIMIT]: 50, [TradeType.ADVANCED]: 30 },
    [SupportedChainId.BNB]: { [TradeType.SWAP]: 100, [TradeType.LIMIT]: 50, [TradeType.ADVANCED]: 30 },
    [SupportedChainId.LINEA]: { [TradeType.SWAP]: 100, [TradeType.LIMIT]: 50, [TradeType.ADVANCED]: 30 },
    [SupportedChainId.PLASMA]: { [TradeType.SWAP]: 100, [TradeType.LIMIT]: 50, [TradeType.ADVANCED]: 30 },
    [SupportedChainId.SEPOLIA]: { [TradeType.SWAP]: 100, [TradeType.LIMIT]: 50, [TradeType.ADVANCED]: 30 },
  },
  recipient: '0x0000000000000000000000000000000000000000',
}

// Same fee for all, different recipient per network and per trade type
const c: PartnerFee = {
  bps: 100,
  recipient: {
    [TradeType.SWAP]: {
      [SupportedChainId.MAINNET]: '0x...a',
      [SupportedChainId.ARBITRUM_ONE]: '0x...b',
      [SupportedChainId.BASE]: '0x...bb',
      [SupportedChainId.GNOSIS_CHAIN]: '0x...c',
      [SupportedChainId.AVALANCHE]: '0x...c',
      [SupportedChainId.POLYGON]: '0x...c',
      [SupportedChainId.BNB]: '0x...c',
      [SupportedChainId.LINEA]: '0x...c',
      [SupportedChainId.PLASMA]: '0x...c',
      [SupportedChainId.SEPOLIA]: '0x...d',
    },
    [TradeType.LIMIT]: {
      [SupportedChainId.MAINNET]: '0x...e',
      [SupportedChainId.ARBITRUM_ONE]: '0x...f',
      [SupportedChainId.BASE]: '0x...ff',
      [SupportedChainId.GNOSIS_CHAIN]: '0x...g',
      [SupportedChainId.AVALANCHE]: '0x...x',
      [SupportedChainId.POLYGON]: '0x...y',
      [SupportedChainId.BNB]: '0x...y',
      [SupportedChainId.LINEA]: '0x...y',
      [SupportedChainId.PLASMA]: '0x...y',
      [SupportedChainId.SEPOLIA]: '0x...h',
    },
    [TradeType.ADVANCED]: {
      [SupportedChainId.MAINNET]: '0x...j',
      [SupportedChainId.ARBITRUM_ONE]: '0x...i',
      [SupportedChainId.BASE]: '0x...ii',
      [SupportedChainId.GNOSIS_CHAIN]: '0x...k',
      [SupportedChainId.AVALANCHE]: '0x...z',
      [SupportedChainId.POLYGON]: '0x...t',
      [SupportedChainId.BNB]: '0x...t',
      [SupportedChainId.LINEA]: '0x...t',
      [SupportedChainId.PLASMA]: '0x...t',
      [SupportedChainId.SEPOLIA]: '0x...l',
    },
  },
}
See FlexibleConfig type for more information.
Advanced configuration
The partnerFee parameter can be set in a more advanced way using events.
For example, you can define different fees for different assets:
import { createCowSwapWidget, CowSwapWidgetParams, CowEventListeners, CowEvents } from '@cowprotocol/widget-lib'

let updateParams = null

const recipient = '0x0000000000000000000000000000000000000000'

const defaultPartnerFee = { bps: 50, recipient }

const params: CowSwapWidgetParams = { appCode: 'YOUR_APP_ID', partnerFee: defaultPartnerFee }

const listeners: CowEventListeners = [
  {
    event: CowEvents.ON_CHANGE_TRADE_PARAMS,
    handler: (event) => {
      if (!updateParams) return

      if (event.sellToken.symbol === 'DAI') {
        updateParams({ partnerFee: { bps: 20, recipient } })
      } else if (event.sellToken.symbol === 'USDC') {
        updateParams({ partnerFee: { bps: 10, recipient } })
      } else {
        updateParams({ partnerFee: defaultPartnerFee })
      }
    },
  },
]

const widget = createCowSwapWidget(container, { params, listeners })

updateParams = widget.updateParams
Fee BPS
The fee in basis points (BPS). One basis point is equivalent to 0.01% (1/100th of a percent).
The fee cannot exceed 1% (100 bps).
Recipient
The recipient is the address to which the fee will be sent.
Make sure that the fee recipient address exists on the respective network defined in the parameters. For example, if you use a Safe as a recipient and the Safe was created on Ethereum mainnet, then for Gnosis Chain you must create another Safe and set it as a fee recipient.
As a fee recipient, you can specify either string or a key-value pair in the format chainId: recipientAddress:
import type { CowSwapWidgetParams, SupportedChainId } from '@cowprotocol/widget-lib'

const params: CowSwapWidgetParams = {
  partnerFee: {
    bps: 50, // 0.5%
    recipient: { 1: '0x0000000000000000000000000000000000000001', 100: '0x0000000000000000000000000000000000000002' },
  },
}
Once you have set up the partner fee, you will see the fee in the CoW Swap UI:
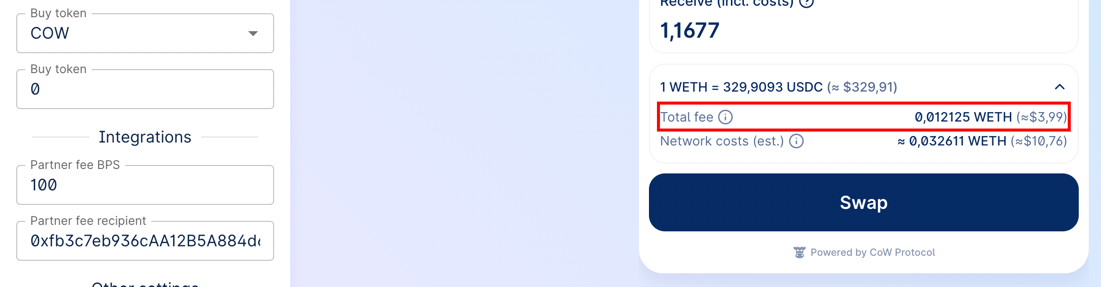
Terms and conditions apply.
See here for detailed info about fee calculation and examples.
Slippage configuration
The widget supports declarative slippage settings. This allows you to fine‑tune the minimum, maximum and default slippage per network.
Types
/** Slippage expressed in basis points (1 % = 100 bps) */
export interface SlippageConfig {
  /** Lower bound. Values below this will be clamped */
  min?: number
  /** Upper bound. Values above this will be clamped */
  max?: number
  /** Default slippage */
  defaultValue?: number
}

export type FlexibleSlippageConfig = FlexibleConfig<SlippageConfig>
All values are basis points (bps).
Parameter
Add the slippage field to CowSwapWidgetParams:
import { createCowSwapWidget, CowSwapWidgetParams } from '@cowprotocol/widget-lib'

const params: CowSwapWidgetParams = {
  appCode: 'YOUR_APP_ID',
  slippage: {
    // Global rule – applies to every network
    min: 50, // 0.50 %
    max: 300, // 3.00 %
    defaultValue: 100, // 1.00 %
  },
}
Or configure per‑network rules using the same FlexibleConfig pattern as partnerFee:
import { SupportedChainId } from '@cowprotocol/widget-lib'

const params: CowSwapWidgetParams = {
  slippage: {
    [SupportedChainId.MAINNET]: { min: 1, max: 3900, defaultValue: 3000 },
    [SupportedChainId.BASE]: { min: 500, max: 5000, defaultValue: 600 },
  },
}
Behaviour & validation
| Rule | Description |
|---|---|
| Ranges | min ≥ 0, max ≤ 5000 (50 %), min ≤ defaultValue ≤ max, min < max |
| Defaults | If the user doesn’t specify a slippage, the widget falls back to defaultValue |
| Auto slippage | If the auto-slippage is less than or equal to defaultValue, the swap will use defaultValue |
| ETH‑Flow floor | When defaultValue < 200 bps (2 %) for Ethereum Mainnet or defaultValue < 50 (0.5 %) for other networks and the trade is ETH‑Flow, the widget will force the slippage to 2 %/0.5 % |
Example JSON (Configurator ready)
{
  "slippage": {
    "1": { "min": 1, "max": 3900, "defaultValue": 3000 },
    "8453": { "min": 500, "max": 5000, "defaultValue": 600 }
  }
}
Paste the snippet into RAW JSON params → open the Swap form → check that the Settings panel reflects the configured slippage.
Wallet provider
You can pass the wallet provider from your application to seamlessly use the widget as part of your application. Also, you can not specify the provider, in this case the widget will work in standalone mode with the ability to connect any wallet supported in CoW Swap.
A provider must comply with EIP-1193 and implement the interface:
interface EthereumProvider {
  on(event: string, args: unknown): void

  request<T>(params: JsonRpcRequest): Promise<T>

  enable(): Promise<void>
}

interface JsonRpcRequest {
  id: number
  method: string
  params: unknown[]
}
An example of connecting a widget to Rabby Wallet or Metamask:
import { createCowSwapWidget, CowSwapWidgetParams } from '@cowprotocol/widget-lib'

createCowSwapWidget(document.getElementById('cowswap-widget'), {
  params: { appCode: 'NAME-OF-YOU-APP' }, // Add here the name of your app. e.g. "Pig Swap"
  provider: window.ethereum, // <-------
})
Configuration
CowSwapWidgetParams
All params are optional
| Parameter | Type | Default | Description |
|---|---|---|---|
width | string | 400px | The width of the widget in css values (px, vh, etc.). |
height | string | 600px | The height of the widget in css values (px, vh, etc.). |
maxHeight | number | --- | The widget automatically adjusts its height depending on the content. By default, the maximum height is body.offsetHeight, but it might be customized using the maxHeight parameter. |
appCode | string | --- | The unique identifier of the widget consumer. Please fill the for to let us know a little about you: https://cowprotocol.typeform.com/to/rONXaxHV. |
provider | EthereumProvider | --- | The Ethereum provider to be used for interacting with a wallet. To connect, for example, to Rabby Wallet or Metamask, just set window.ethereum. You also might like to use https://web3modal.com. |
chainId | number | 1 | The blockchain ID on which the trade will take place. Currently supported: 1 (Mainnet), 100 (Gnosis chain), 42161 (Arbitrum one), 8453 (Base), 11155111 (Sepolia). |
tradeType | TradeType | 'swap' | The type of trade. Can be swap or limit or advanced. |
env | CowSwapWidgetEnv | 'prod' | The environment of the widget (local , prod , dev , pr). See COWSWAP_URLS const value for urls. |
sell | TradeAsset | Same as in swap.cow.fi | An object containing information about the sell asset. Example: { asset: 'WBTC', amount: 12 } or { asset: '0xa0b86991c6218b36c1d19d4a2e9eb0ce3606eb48' }. |
buy | TradeAsset | --- | An object containing information about the buy asset. Example: { asset: 'WBTC', amount: 12 } or { asset: '0xa0b86991c6218b36c1d19d4a2e9eb0ce3606eb48' }. |
theme | CowSwapTheme | 'light' | The theme of the widget ('dark' for dark theme or 'light' for light theme). It is also possible to set your own colors (CowSwapWidgetPalette). See Custom theme section for more details. |
sounds | CowSwapWidgetSounds | --- | The famous MOOO! sound can be changed to something else, just provide a link to a media file (mp3 or any other audio format supported by your browser). You can also specify a value of null to disable the sound. |
images | CowSwapWidgetImages | --- | To make your widget unique, you can replace some of the images. For example, a stub image when there are no limit orders. |
banners | CowSwapWidgetBanners | --- | With this option you can control the display of some banners in the CoW Swap interface. |
tokenLists | string[] | --- | CoW Swap uses the token lists standard, which allows flexible and decentralized management of assets for trading. Using this option you can set any token list you want. You also might want to use customTokens option for more flexible configuration. |
customTokens | TokenInfo[] | --- | In the case when you want to use tokens that are not included in the default token lists, you can add them programmatically by simply passing an array of ERC-20 tokens info. There is also tokenLists option to set a ready-made list of tokens. |
disableToastMessages | boolean | false | CoW Swap displays a pop-up notification when certain events occur, for example: an order has been filled. You may want to handle these events yourself and disable the display of notifications in the widget, to do this you need to enable this option. See Events handling section for more details. |
disablePostedOrderConfirmationModal | boolean | false | Disables showing the confirmation modal after posting an order. |
disableProgressBar | boolean | false | Disables showing the progress bar after a SWAP order is placed. |
disableCrossChainSwap | boolean | false | Disables cross-chain swaps (aka Swap and Bridge) feature. |
standaloneMode | boolean | false | When this option is enabled, the widget will use its own Ethereum provider and the user will be able to connect a wallet from within the widget. |
hideNetworkSelector | boolean | false | Disables an opportunity to change the network from the widget UI. |
hideLogo | boolean | false | Hides the logo in the widget. |
hideBridgeInfo | boolean | false | Hides bridge info in the swap form. |
hideOrdersTable | boolean | false | Hides orders table on limit and advanced forms. Warning! When true, users won't be able to see their limit/twap order status or history, neither they'll be able to cancel active orders. |
enabledTradeTypes | Array<TradeType> | All are enabled | CoW Swap provides three trading widgets: swap, limit and advanced orders. Using this option you can narrow down the list of available trading widgets. |
partnerFee | PartnerFee | --- | You can enable a fee for all trades in the widget. See Partner fee section for more details. |
forcedOrderDeadline | ForcedOrderDeadline | --- | Order deadline in minutes. Either a single value applied to each individual order type accordingly or an optional individual value per order type. The app will use the appropriated min/max value per order type. When set, user's won't be able to edit the deadline. Accepted values: single for all 123 OR per TradeType {"swap": 15, "limit": 666} OR per network {1: 35, 100: 5} |
slippage | SlippageConfig | --- | You can set up a slippage settings for all networks in the widget. See Slippage configuration section for more details. |
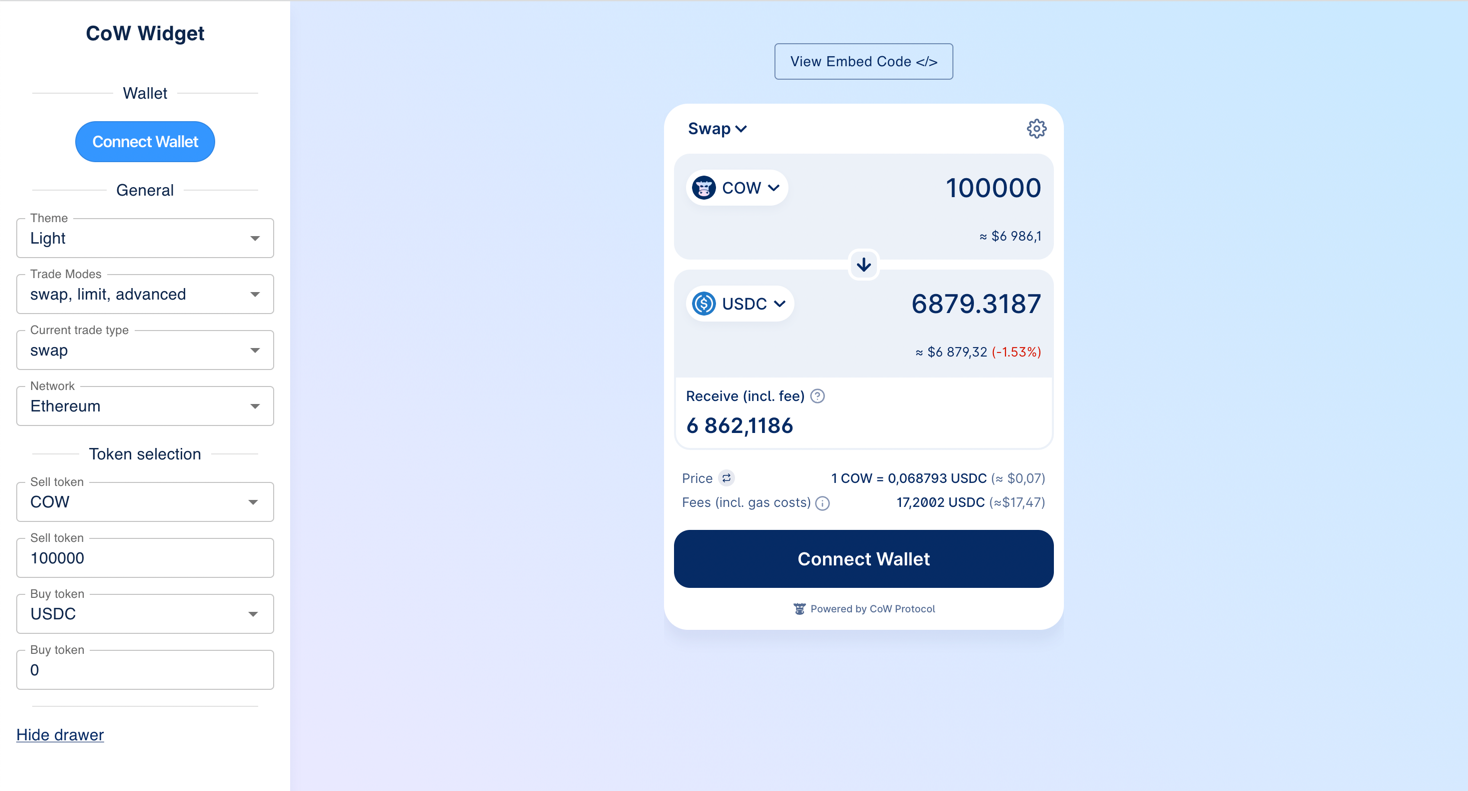
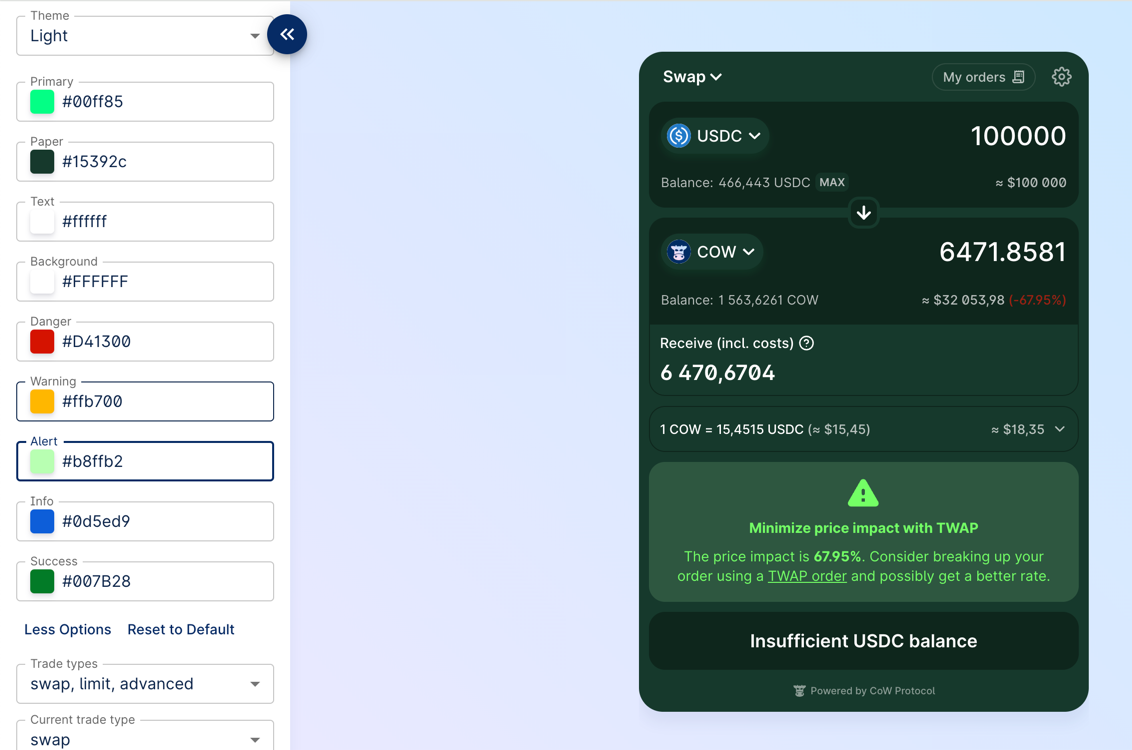
Custom theme
By setting custom colors you can very flexibly control the appearance of the widget.
To do this, you need to pass an object of type CowSwapWidgetPalette to the theme parameter.
You actually can specify only 2 or 3 basic colors, the rest of the palette is efficiently derived (also with the help of the color2k library to get 'AA' rated text/background color contrasts).
Example:
import { createCowSwapWidget, CowSwapWidgetParams, CowSwapWidgetPalette } from '@cowprotocol/widget-lib'

const widgetContainer = document.getElementById('cowswap-widget')

// Set custom colors
const theme: CowSwapWidgetPalette = {
  baseTheme: 'light',
  primary: '#00ff85',
  background: '#f7f7f7',
  paper: '#1a4435',
  text: '#ffffff',
  warning: '#ffb700',
  alert: '#b8ffb2',
  success: '#19ff64',
}
const params: CowSwapWidgetParams = {
  appCode: 'NAME-OF-YOU-APP', // Add here the name of your app. e.g. "Pig Swap"
  theme,
}

createCowSwapWidget(widgetContainer, { params })
Try it yourself: https://widget.cow.fi.
Custom tokens
CowSwap uses the token lists standard, which allows flexible and decentralized management of assets for trading.
You can manage the list of tokens in CoW Swap UI:
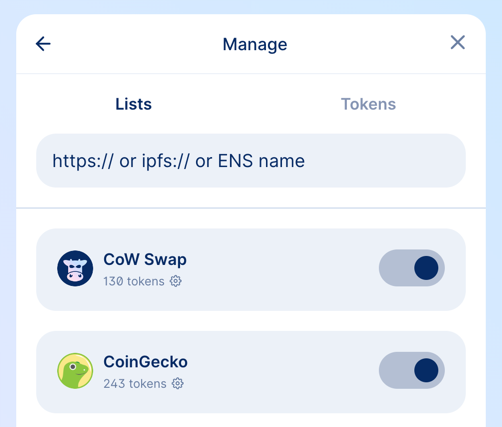
In the widget you have two options to add custom tokens:
- using
tokenListsparameter - using
customTokensparameter
tokenLists
In this parameter you can specify the URL or ENS address of the token list.
How to create and deploy your own token list you can find in the guide.
import { createCowSwapWidget, CowSwapWidgetParams } from '@cowprotocol/widget-lib'

const container = document.getElementById('cowswap-widget')

const params: CowSwapWidgetParams = { tokenLists: ['https://files.cow.fi/tokens/CowSwap.json'] }

createCowSwapWidget(container, { params })
customTokens
If you want to use tokens that are not included in the default token lists, you can add them programmatically by passing an array of ERC-20 tokens info.
import { createCowSwapWidget, CowSwapWidgetParams, TokenInfo } from '@cowprotocol/widget-lib'

const container = document.getElementById('cowswap-widget')

const customTokens: TokenInfo = [
  {
    chainId: 1,
    address: '0x69D29F1b0cC37d8d3B61583c99Ad0ab926142069',
    name: 'ƎԀƎԀ',
    decimals: 9,
    symbol: 'ƎԀƎԀ',
    logoURI: 'https://assets.coingecko.com/coins/images/31948/large/photo_2023-09-25_14-05-49.jpg?1696530754',
  },
  {
    chainId: 1,
    address: '0x9F9643209dCCe8D7399D7BF932354768069Ebc64',
    name: 'Invest Club Global',
    decimals: 18,
    symbol: 'ICG',
    logoURI: 'https://assets.coingecko.com/coins/images/34316/large/thatone_200%281%29.png?1704621005',
  },
]

const params: CowSwapWidgetParams = { customTokens }

createCowSwapWidget(container, { params })
Events handling
The widget provides a bus of events that occur in the widget.
Using it, you can receive notifications, for example, when an order has been executed or when an approval transaction has been mined.
Separately, it is worth noting the ON_TOAST_MESSAGE event; it occurs every time any notification is displayed in CoW Swap.
To avoid double display of notifications, enable the disableToastMessages option in the widget configurations.
A list of all possible events can be found in the source code on Github.
Events usage example
import { createCowSwapWidget, CowSwapWidgetParams, CowEventListeners, CowEvents } from '@cowprotocol/widget-lib'

const params: CowSwapWidgetParams = { appCode: 'YOUR_APP_ID' }

const listeners: CowEventListeners = [
  { event: CowEvents.ON_TOAST_MESSAGE, handler: (event) => console.log('[ON_TOAST_MESSAGE]', event.message) },
  { event: CowEvents.ON_EXPIRED_ORDER, handler: (event) => console.log('Order was expired:', event.order) },
]

const { updateListeners } = createCowSwapWidget(container, { params, listeners })

// If you want to change listeners at some point, you can do it like:
updateListeners([
  { event: CowEvents.ON_CANCELLED_ORDER, handler: (event) => console.log('Order was cancelled:', event.order) },
])
Widget updating
You can change all possible widget options on the fly:
import { createCowSwapWidget, CowSwapWidgetParams } from '@cowprotocol/widget-lib'

const container = document.getElementById('cowswap-widget')

const params: CowSwapWidgetParams = {
  appCode: 'NAME-OF-YOU-APP', // Add here the name of your app. e.g. "Pig Swap"
  logoUrl: 'YOUR_LOGO_URL',
}

const updateWidget = createCowSwapWidget(container, { params })

// Update the widget
updateWidget({
  ...params,
  theme: 'dark', // <- Change theme to dark
  hideNetworkSelector: true, // <- Hide the network selector
})
Widget URL
Most of the widget parameters are controlled via the URL, which means that you can create the URL yourself and embed the iframe. An example of URL:
https://swap.cow.fi/#/100/swap/WXDAI/GNO?sellAmount=200&theme=dark
Customization
Sounds
import { createCowSwapWidget, CowSwapWidgetParams } from '@cowprotocol/widget-lib'

const container = document.getElementById('cowswap-widget')

const params: CowSwapWidgetParams = {
  sounds: {
    // The sound that will be played when the order is placed
    postOrder: 'https://swap.cow.fi/audio/send-winterTheme.mp3',
    // Nothing will be played when the order is executed
    orderExecuted: null,
    // Since `orderError` is not specified, the default sound will be played
  },
}

createCowSwapWidget(container, { params })
Images
In the example below, we replace the image that is displayed when there are no orders in the limit orders table.
You can replace any image in the widget in the same way.
import { createCowSwapWidget, CowSwapWidgetParams } from '@cowprotocol/widget-lib'

const container = document.getElementById('cowswap-widget')

const params: CowSwapWidgetParams = { images: { emptyOrders: 'https://cow.fi/images/cowamm-illustration-lvr.svg' } }

createCowSwapWidget(container, { params })

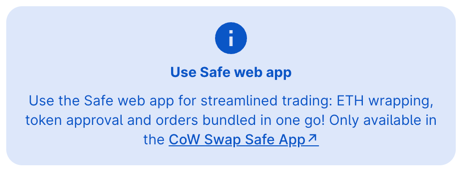
Banners
In some cases, you may want to hide some banners in the CoW Swap interface.
To do this, you need to specify the banners parameter in the widget configuration.
import { createCowSwapWidget, CowSwapWidgetParams } from '@cowprotocol/widget-lib'

const container = document.getElementById('cowswap-widget')

const params: CowSwapWidgetParams = { banners: { hideSafeWebAppBanner: true } }

createCowSwapWidget(container, { params })
This banner will be hidden: